


The Kaby Lake CPUs from Intel are out, aimed at main stream consumer bracket these chips are the successor of the 'now' previous gen Sky Lake which happened to have been a very successful SKU for Intel last year! Though not an entirely new processor the Kaby Lake is a slight improvement over Sky Lake offering more performance per watt and this time scratching the overclocker's back with enormous overclocking potential right out of the box.
As new processor means new motherboards this story is no different. Kaby Lake brought in the Z270 PCH motherboards and today thanks to Gigabyte India we have with us their more budget friendly AORUS Z270X Gaming 7 motherboard for review!
Gigabyte's new Aorus series is basically its high end hardware exclusive branding separating the budget offerings from the rest. Its like what's AMG to Mercedes is what Aorus to Gigabyte!

One of the biggest upgrades in the Z270 motherboards is not only the support for Intel's Optane Memory but also the fact that the PCH has 24 PCIe Gen3 Lanes to allocate to various I/O ports, SATA ports or even USB 3.1 ports making it a more connectivity rich motherboard especially for those who rely on such options a bit more. The Aorus Z270X Gaming 7 is no exception, coming in at Rs 28,500 its loaded with RGB Fusion, Creative SoundCore 3D, thunderbolt 3 port and a massive support for 4000Mhz+ XMP profile.
Packing and Accessories

From the box itself we can see the emphasis that Gigabyte is putting to introduce its new Aorus lineup to the masses.
The front boasts a huge Aorus branding with its eagle logo and the Z270X Gaming 7 name printed in crisp font with a multi-color paint. Some more details with logos are printed at the bottom and a tiny nearly camouflaged Gigabyte logo is there at the bottom right just to reassure people that its a Gigabyte product and not something sheer alien!

The back unlike the front is printed to the brim with features! It has a similar layout like the previous boards with exclusive new features taking center stage such as the RGB Fusion and Smart Fan 5. All in all the packing is impressive and I kind of like this new shiny layer on the box.
Open the box and you'll find the motherboard in an anti-static bag resting on top of the bottom compartment that houses all the accessories.

Gigabyte has kept the accessories package to a bare minimum probably in an attempt to cut costs. The package includes User's manual, Installation pamphlet, 4x SATA cables, 1x HB SLI bridge, LED lit rear I/O shield, front panel connector block or the G-connector, display output port covers, 5-pin RGB extension cable, 2x thermistor cables, Aorus velcro cable ties. Cable labeling sticker and a Aorus decal is also provided.
Closer Look and Features

Our first impression of the Aorus Z270X Gaming 7 is that its beefy! The matte black board with white I/O shield and PCH heatsink make it stand out giving it a revamped feel of the Z170X Gaming 7.

The Z270X Gaming 7 is one of the few boards out there that have a perfect blend of elegance & style to it atleast when the LEDs are turned off. The pearl white and black color combination is a great contrast & will appeal to a lot of system builders.

Gigabyte logo or branding has been replaced by Aorus and we can see the Aous logo on the Z270 PCH heatsink aswell. Its a white metallic trim over a ceramic heatsink which is not only an effective cooling solution but also looks quite attractive.

Looking at the CPU area we can see the LGA 1151 socket resting in a remarkably clean area. This is the same socket that you can find on the Sky Lake compatible motherboards hence if you want to use a Kaby Lake CPU on your Z170/H170 motherboard then it might be a possibility after a BIOS upgrade.

DIMM slots are LED illuminated and reinforced by metal shields to not only work as an EMI shielding to the RAM sticks to ensure hindrance free performance but also to impart tensile strength to the slots in case one uses tall or heavy Memory kits like my Kingston HyperX Predator.
These support a maximum of 64GB DDR4 memory kit working at a maximum frequency of 4000Mhz. Also the mounting mechanism is changed and both the locking brackets need to be opened prior to DRAM installation.

Due to the premium nature of this board Gigabyte didn't hesitate to provide a bunch of dedicated on-board buttons to aid the users especially those working on an open testbench. These are namely the Power button, ECO Mode button and the OC button. Also two small buttons in black and white are provided, they are the Rest switch in white while the Clear CMOS switch is in black.

Physical voltage read points are provided at the north of the DIMM slots to aid in voltage reading through a multi-meter. This makes the Gaming 7 an ideal motherboard for open test bench and overclocking enthusiasts.

Turn your gaze towards the PCIe area and we see three PCIe 3.0x16 slots and three PCIex1 slots for devices of a bygone era! Two M.2 slots are also provided that we'll discuss later on.
All three full sized PCIe slots are armored to support large and heavy graphics card. If you are using a Kaby Lake or Sky Lake CPU then the configuration would be as follows for SLI configurations:
Single Card: 16x/0/0/
Dual SLI: 8x/8x/0/
Tri SLI: 8x/8x/4x/
Now for the noteworthy points, the first and second full length PCIe slots receive their share of 16xPCIe lanes from the CPU whereas the bottom PCIe slot is fed with 4x PCIe lanes from the Z270 PCH which in turn it shares with the bottom most M.2 port!
So ideally the Z270X Gaming 7 is meant to be used in a dual GPU configuration with dual M.2 SSDs at max.

A small yet notable feature lies in the spacing of the first and second PCIe slots that give more space between two graphics card when installed in SLI, this in turns maximizes the airflow keeping even heavy GPUs cool under load when used with stock air coolers!

Coming over to the M.2 SSDs its interesting to note that Gigabyte has made the Z270X Gaming 7 a more storage concentric board which is evident from the fact that both the 4xPCIe Gen 3 SSDs and the U.2 SSD can be used simultaneously in RAID 0 setup since they draw their PCIe lanes from the PCH directly and not from the CPU or even share them with eachother.
The top slot can accommodate a SSD of 110mm in length while the bottom one has a capacity for a 80mm SSD.

The standard 6Gb/s SATA storage ports are six in numbers and can form three SATA express ports if needed! A dedicated U.2 ports is also provided & is a carry on from previous designs. Interestingly two of these SATA ports are disabled if you populate the upper M.2 slot which is quite a tactical distribution of PCIe lanes from Gigabyte for this board saving on a add-on SATA 6Gb/s chipset.

The I/O panel is scantly populated with a PS/2 keyboard-mouse port, six USB 3.0/2.0 ports, one USB Type-C port, one USB 3.1 Type A port (red), one optical S/PDIF out connector, one gold plated HDMI port, two RJ-45 ports and 5x HD audio jack. I kind of miss the presence of a few more USB ports since we already have just one PS/2 port for keyboard/mouse.
Gigabyte took the more expensive option of using the Intel Thunderbold 3 technology to provide 40Gbps of speed through the single USB Type-C connector along with a HDMI 1.4 port that's not capable of 4K60 output but the DisplayPort 1.2 is.
Dual LAN ports are powered by two different vendors namely as Intel and Killer's E2500 so it doesn't support double-teaming for double bandwidth! I really don't like this implementation as it increases the cost just for the sake of compatibility!

When its premium then it has to be premium in every manner! The AMP UP audio solution for the Gaming 7 is a Creative SoundCore 3D which on paper is nothing but perfection.


A Creative Sound Core3D CA0132 chip rests under the plastic shroud which is supported by a Burr Brown OPA2134 operational amplifier to deliver high grade distortion free audio signal. Additional audio filtration is attained by Nichicon Fine Gold audio capacitor.

The Aorus Z270X Gaming 7 is powered by a 11 phase all digital power delivery system. This arrangement is more than enough to power and overclock a Sky Lake or Kaby Lake CPU even under high loads.

Intersil’s ISL95866 chip which is a hybrid digital PWM controller is implemented to control the power delivery system. For the MOSFETs Gigabyte parted ways with the usual International Rectifiers PowIRstage solutions and opted for the Vishay PowerPAK SiRA12DP and SiRA18DP N-channel MOSFETs for the CPU and Memory power delivery system.

IT8792E which is the first embedded controller (EC) we find on this board, its purpose is to expand OC features and fan control.

For the purpose of I/O control a IT8686E chip is placed right next to the Z270 PCH.


Intel’s 4xPCIe Gen 3.0 JHL6540 controller is used to provide Thunderbolt 3 and USB 3.1 connectivity along with a Texas Instruments TPS65982 switch for USB Type-C functionality and Power Delivery 2.0 operation.

Four ASMedia ASM1480 multiplexers are responsible for routing the PCIe lanes between the top two PCIe 3.0 x16 slots.
BIOS and Bundled Software
BIOS Overview

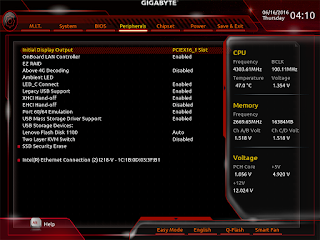
The BIOS for the Aorus Z270X Gaming 7 looks similar to that of the other new generation boards from Gigabyte with a red and black layout.
Gigabyte has parted ways from its older BIOS styling that we are accustomed to bringing in a more balanced approach towards styling and functionality without any hassles or distractions.
The BIOS theme looks like a space ship HUD coated in blood red color scheme. The labels and tabs in the Classic mode are the same as the previous generation so users won't face any problem in finding their favorite settings.
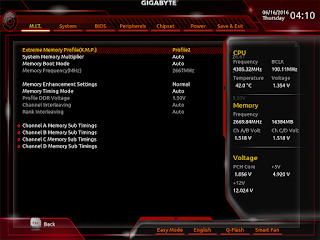


Pressing the left Alt key brings up a small menus from the bottom giving you quick options like to switch to the Easy Mode, Change the language, Q-Flash and Smart Fan. Whereas the right Alt key brings a slider menu from the right side of the screen giving you vital information about the CPU/Memory frequency, Core voltage and temperature.

Smart Fan is well laid out and gives full control over fan behavior and AIO pumps. You can even set a custom RPM to Temperature graph!

Q-Flash is for BIOS flashing and backup, I personally love the graphical approach that Gigabyte took even for such a small yet important function. We even flashed the BIOS to the Beta version F4k.

Last is the Easy Mode layout which gives a comprehensive layout of the common settings such as fan speed, energy options, XMP profile etc.
Bundled Software
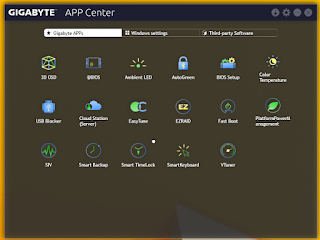

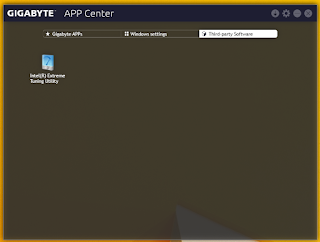
The main screen is now a proper window and not a pop up scroll bar from the bottom right of your screen. Three different tabs make it a one stop place since you get Gigabyte Apps in one and the entire Window's Control Center in another tab. A Third Party Software tab is also there though it only recognizes a few and in my case only the Intel XTU suite was recognized.

Rest of the Apps look the same as previous with a few tits and bits of changes. But as long as they are functional/helpful I'm Okay with it and fortunately they all work just fine in my case.


The RGB Fusion App in the App center allows you to take full control over the motherboard's LEDs that are embedded throughout the surface. You can either turn them ON/OFF or set them to operate in a pre-defined manner. One change from the previous boards is that you can choose colors for each corner of the motherboard which is quite funky at times.
Benchmarks and Overclocking

Putting all the components together and booting up into Windows was a breeze with the Aorus Z270X Gaming 7. Everything worked properly and installed properly without any issue. The motherboard looks elegant and all black when off or when the LEDs are turned down ensuring no hindrance with the glow and appearance of the motherboard LEDs whatsoever.
For the benchmarks we used the following test setup configuration --
CPU: Intel Core i7 7700K 4.2Ghz
Motherboard: Aorus Z270X Gaming 7
RAM: Adata XPG Dazzle 16GB 2400Mhz Memory Kit
Cooler: Corsair H100i GTX (Push Pull Configuration)
Graphics Card: MSI GTX 1050 Ti Gaming X 4 4GB GDDR5
Storage: Corsair Neutron GTX 480GB SSD
Power Supply: Corsair AX860i 860W 80+ Platinum
OS: Windows 8.1 Pro 64-bit
GPU Driver: ForceWare 375.70

The Intel i7 7700K comes with 4.2Ghz and 4.5Ghz boost. The system was stable on stock setting so we started our overclocking journey with this Kaby Lake offering and reached a stable 5Ghz with 1.41v but the memory didn't reach past its XMP profile of 2400Mhz even though its capable of reaching 3000Mhz CL16. The issue is due to the BIOS and will be fixed soon once the motherboard releases in the market officially. Take note that the Kaby Lake chips tend to run hot and we did hit near 100°C at this frequency even with 15°C ambient temperature!

So we clocked down to 4.8Ghz to keep the CPU within safe temperature marks. Hence, all our benchmarks would show the CPU at 4.8Ghz with memory at 2400Mhz CL16.

AIDA64 Cache & Memory Benchmark

AIDA64 Extreme Edition is a great tool to bench your CPU and RAM in terms of their read-write-copy abilities. Our i7 7700K showed an impressive score along with the ADATA XPG Dazzle kit.
AIDA64 GPGPU

The reason for including this benchmark was to simply observe the AES and Hash Test which is a determent of how easily your CPU or GPU can crunch complex calculations and higher score is always regarded better.
7-Zip

7zip is a compression and decompression program that utilizes the processing power of the CPU alone. It is a synthetic benchmark that gives results very close to real life scores.
Intel XTU

The Intel XTU utility not only helps one to overclock and test the system stability all in one place but also can be used to benchmark the processor in terms of comparative score.
Cinebench R15 & Cinebench R11.5


Cinebench uses Maxon's Cinema 4D engine to render a photo-realistic scene of some shiny balls and weird things (we miss the motorbike). The scene is highly complex, with reflections, ambient occlusion and procedural shaders so it gives a CPU a tough workout.
As Cinema 4D is a real-world application - used on films such as Spider-Man and Star Wars - Cinebench can be viewed as a real-world benchmark.
wPrime v2.10

wPrime is a leading multithreaded benchmark for x86 processors that tests your processor performance by calculating square roots with a recursive call of Newton’s method for estimating functions.
SuperPi Mod v1.5

SuperPi is a simple program that utilizes the processing power and memory speed of the system to calculate the value of Pi upto 1 Million or 32 Million decimal point depending upon what you choose. The time is calculated in minutes and seconds, we'll take them both in seconds, so lower the score faster is your computer.
Unigine Heaven 4.0 and Unigine Valley 1.0


A compilation of 26 beautiful scenes rendered and run via the raw GPU power of the system. It emulates any game or graphical work that you'll perform on the system scoring it on various parameter. We ran the test on Custom preset and settings at 1920x1080 resolution, quality to ultra and extreme tessellation.
3D Mark Fire Strike

Fire Strike by 3D Mark is a test suit that plays a cinematic scene to determine the FPS, GPU temperature and CPU temperature scaling everything via a cumulative score. It is a great tool to benchmark your GPU since the render is GPU dependent.
3D Mark 11 Professional Edition

Another variant of the Fire Strike by 3D Mark, used mainly for scoring the GPU performance.
Crysis 3

I can't start gaming benchmarks without running my all time favorites Crysis 3 but its a game that no system loves! The CryEngine 3 behind this scenic beauty can bring down any system to its knees and I mean any system. I set everything to Ultra at 1920x1080 resolution with MSAA 4X and motion blur high.
Rise of the Tomb Raider

The latest installation of Lara Croft in the spectacular Rise of the Tomb Raider 2016 with stunning graphics and rich location makes it a great game to benchmark with while enjoying in the due course! We used DX12 and settings were at Ultimate on full HD resolution.
Batman Arkham Knight

Since the game is powered by Epic's Unreal Engine 3 and supports DX11 tessellation so playing this game on 1920x1080 resolution with all settings maxed out can be any modern system's 'worst nightmare'!
DOOM

Finally we've introduced this much awaited titled to our benchmarks! Developed by ID Software Doom or popularly written as DOOM is a reboot of the older Doom series. Its fast and scary with more than enough variety of guns that you can ever imagine or even use!
Its OpenGL and quality is set to Ultra.
CrystalDiskMark 5.0.2

CrystalDiskMark is a disk benchmark software that analyses different types of hard drive. Giving sequential benchmark write and read statistics in MB/s. A simple program that is very useful. As seen the Corsair Neutron GTX performs very well on the Z270X Gaming 7.
My Verdict
Gigabyte has done a fantastic job with the Aorus Z270X gaming 7 in terms of almost anything you put your finger upon! In fact nothing could've been better than this to introduce their Aorus gaming motherboard lineup. The board is not only physically well build but its build to perform. We all know their unmatched ability to integrate RGB LEDs into their products with utmost finis that can please almost anyone instantly, the Z270X Gaming 7 is no different. Overclocking wise the motherboard is matching shoulder with its competition and is easy to use. I'd expect Gigabyte to roll out an entirely new BIOS for Aorus after its release since the name asks so for obvious reasons.
 Layout is clean and everything is in place along with on-board buttons & physical voltage read points that will surely impress and woo the overclocking enthusiasts. The beauty of this product lies in the strategic distribution of the PCIe lanes that enable one to use two M.2 SSDs, a U.2 SSD and a Thunderbolt 3 port simultaneously along with a dual graphics card configuration! What more can you ask for!?
I recommend the Aorus Z270X Gaming 7 each and everyone out their who's looking for a premium motherboard that not only looks premium but performs like one aswell striking a perfect balance between aesthetics & raw performance.
I give it a 7/10 earning our Gold Award


.JPG)


0 comments:
Post a Comment